
今回の記事は制作しているトランプカードアプリでボタンクリックによりCollectionViewに画像(トランプ)を追加する方法に関しての記事です。初心者にも分かりやすいように画像付きで解説しているので是非参考にしてみてください。
CollectionViewに画像を表示させる方法
まずはXcodeにプロジェクトを準備します。
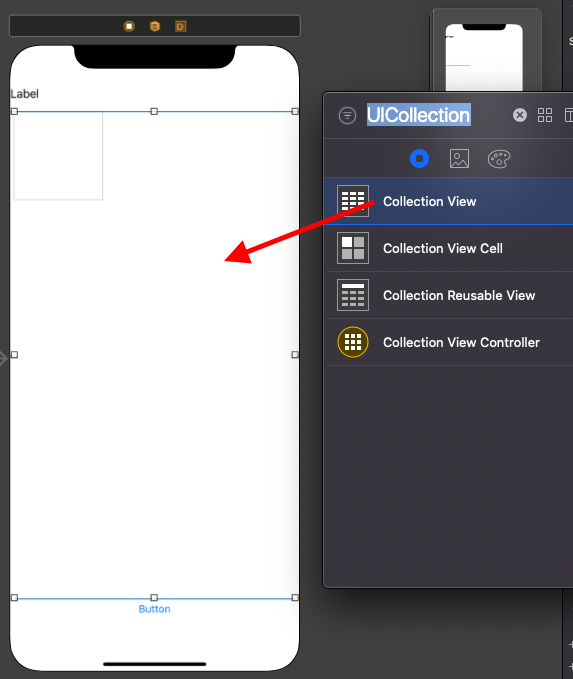
次にすでにセットされているLabel等を削除し、CollectionViewをUIアイテムから選択し、Storyboardにセットします。
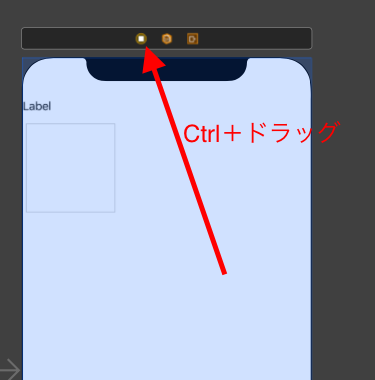
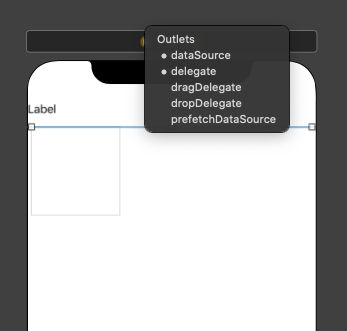
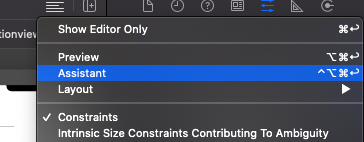
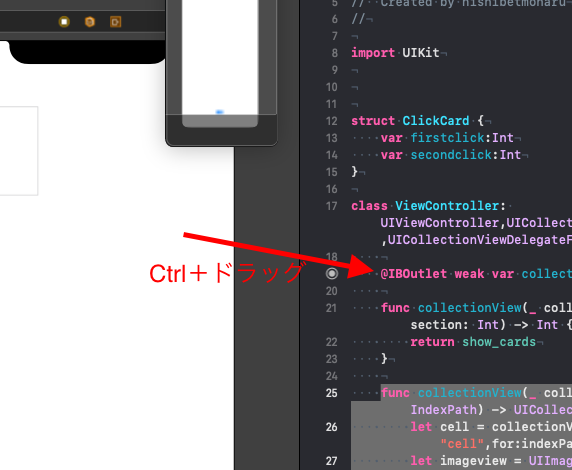
このセットしたCollectionViewのdelegateをセットするため下記のように操作を行います。
最後にCollectionViewをViewcontrollerにoutlet接続を行います。
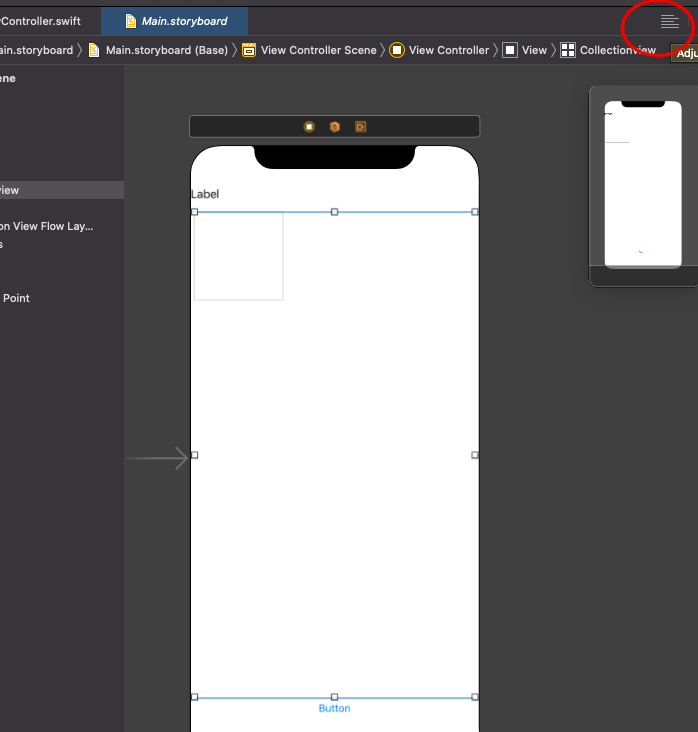
これで準備OKです。
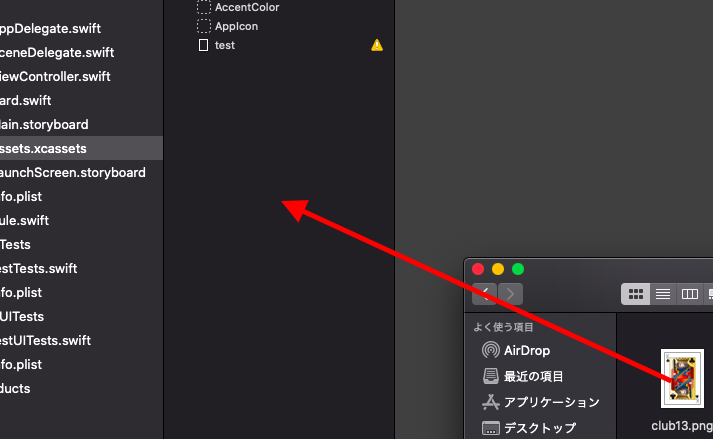
次に表示させる画像をAssetに保存しましょう。今回はテストようなのでなんでも良いです。下記手順で画像を追加しましょう。
ではこれで下記コードを実装することでCollectionViewにが画像を表示できます。
画像の名前は「test」にします。
import UIKit

class ViewController: UIViewController,UICollectionViewDelegate,UICollectionViewDataSource,UICollectionViewDelegateFlowLayout {

    @IBOutlet weak var collectionview: UICollectionView!

    func collectionView(_ collectionView: UICollectionView, numberOfItemsInSection section: Int) -> Int {
        return 100
    }

    func collectionView(_ collectionView: UICollectionView, cellForItemAt indexPath: IndexPath) -> UICollectionViewCell {
        let cell = collectionView.dequeueReusableCell(withReuseIdentifier: "cell",for:indexPath)
        let imageview = UIImageView(frame: CGRect(x: 0, y: 0, width: image_width, height: image_width*1.3))
        imageview.image = UIImage(named:"test")
        cell.contentView.addSubview(imageview)
        return cell
    }

    var screen_width:CGFloat = 0
    var screen_height:CGFloat = 0
    var image_width:CGFloat = 0
    var image_height:CGFloat = 0

    // Screenサイズに応じたセルサイズを返す
    func collectionView(_ collectionView: UICollectionView, layout collectionViewLayout: UICollectionViewLayout, sizeForItemAt indexPath: IndexPath) -> CGSize {
        return CGSize(width: image_width, height: image_width*1.4)
    }

    override func viewDidLoad() {
        super.viewDidLoad()
        collectionview.delegate = self
        screen_width = UIScreen.main.bounds.size.width
        screen_height = UIScreen.main.bounds.size.height
        image_width = (screen_width - 45)/4
        image_height = image_width*1.3
        // Do any additional setup after loading the view.
    }
}
次にボタンクリックを行うとカードを表示させる方法を記載していきます。
端末サイズにあったサイズを表示させています。
ボタンクリックでCollectionViewの表示画像を追加する方法
import UIKit

class ViewController: UIViewController,UICollectionViewDelegate,UICollectionViewDataSource,UICollectionViewDelegateFlowLayout {

    @IBOutlet weak var collectionview: UICollectionView!
    var cardlist:[String] = []
    func collectionView(_ collectionView: UICollectionView, numberOfItemsInSection section: Int) -> Int {
        return show_cards
    }
    func collectionView(_ collectionView: UICollectionView, cellForItemAt indexPath: IndexPath) -> UICollectionViewCell {
        let cell = collectionView.dequeueReusableCell(withReuseIdentifier: "cell",for:indexPath)
        let imageview = UIImageView(frame: CGRect(x: 0, y: 0, width: image_width, height: image_width*1.3))
        imageview.image = UIImage(named:"test")
        cell.contentView.addSubview(imageview)
        return cell
    }

    var screen_width:CGFloat = 0
    var screen_height:CGFloat = 0
    var image_width:CGFloat = 0
    var image_height:CGFloat = 0

    // Screenサイズに応じたセルサイズを返す
    func collectionView(_ collectionView: UICollectionView, layout collectionViewLayout: UICollectionViewLayout, sizeForItemAt indexPath: IndexPath) -> CGSize {
        return CGSize(width: image_width, height: image_width*1.4)
    }
    override func viewDidLoad() {
        super.viewDidLoad()
        collectionview.delegate = self
        screen_width = UIScreen.main.bounds.size.width
        screen_height = UIScreen.main.bounds.size.height
        image_width = (screen_width - 45)/4
        image_height = image_width*1.3
        // Do any additional setup after loading the view.
    }

    var show_cards = 0
    @IBAction func Card_mekuru(_ sender: Any) {
        show_cards = show_cards + 1
        collectionview.reloadData()
    }

}
一番下あたりに設定したボタンアクション「IBAction func Card_mekuru」で表示させるカードの数を指定しています。
このメソッドを使用してうまくカードゲームなどに利用していけば良いと思います。
では今回の記事は以上です。他にもSwift関連の記事を多数記載しているので気になる方は是非参考にしてみてください。
コメント