今回の記事はSwiftを使った開発で、TableViewCell上に配置したUIButtonからページ移動を行う方法をご紹介します。TableViewCell上に配置したUIButtonからのページ移動は通常の流れではできないのでprotocolというものを使用します。分かりやすく記載しているので是非参考にしてみてください。
TableViewCell用のCustomTableViewCellを用意
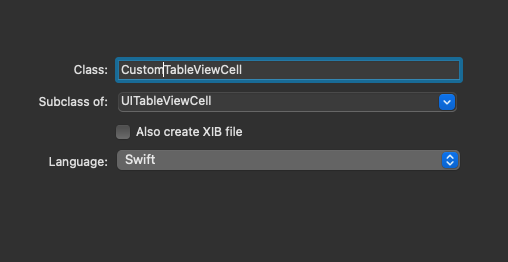
まずはTableViewCell用のカスタムクラスを作成します。
ファイルの追加から「CocoaTouchClass」を追加します。
import UIKit

class CustomTableViewCell : UITableViewCell {

    override func awakeFromNib() {
        super.awakeFromNib()
        // Initialization code
    }

    override func setSelected(_ selected: Bool, animated: Bool) {
        super.setSelected(selected, animated: animated)
        // Configure the view for the selected state
    }
}
CustomTableViewCellにUIButtonを接続
続いてUIButtonをAutlet接続します。
Storyboardから通常のように線を引っ張って接続するだけでいいです。CustomTableViewCell.swiftに接続してください。
//
//  CustomTableViewCell.swift
//  sekaiisan
//
//  Created by nishibetomoharu on 2022/11/25.
//

import UIKit

protocol SampleProtocol {
    func movePage()
}

class CustomTableViewCell : UITableViewCell {

    @IBOutlet weak var sampleButton: UIButton!

    var delegate : CatchProtocol?

    override func awakeFromNib() {
        super.awakeFromNib()
        // Initialization code
    }

    override func setSelected(_ selected: Bool, animated: Bool) {
        super.setSelected(selected, animated: animated)
        sampleButton.addTarget(self,action: #selector(movePage_),
                                   for: .touchUpInside)
        // Configure the view for the selected state
    }

    // Infobutton
    @objc func movePage_(sender:UIButton){
        delegate?.movePage()
    }
}
CustomTableViewCellコード
CustomeTavleViewCell.swiftを修正します。
import UIKit

class CustomTableViewCell : UITableViewCell {

    @IBOutlet weak var sampleButton: UIButton!

    override func awakeFromNib() {
        super.awakeFromNib()
        // Initialization code
    }

    override func setSelected(_ selected: Bool, animated: Bool) {
        super.setSelected(selected, animated: animated)
        sampleButton.addTarget(self,action: #selector(printSenderTag),
                                   for: .touchUpInside)
        // Configure the view for the selected state
    }

    // Infobutton
    @objc func printSenderTag(sender:UIButton){
        print(sender.tag)
    }
}
上記のコードの解説はTableViewを使用しているクラス内のコードをみてからの方が分かりやすいので先にそちらを説明します。
TableViewを使用しているクラス内のコード
// (省略)

// Protocol(SampleProtocol)を追加
class SampleController: UIViewController,UITableViewDelegate,UITableViewDataSource, SampleProtocol  {

    func tableView(_ tableView: UITableView, cellForRowAt indexPath: IndexPath) -> UITableViewCell {
        // Cell
        let cell = tableView.dequeueReusableCell(withIdentifier: "セルに設定した名前", for: indexPath as IndexPath) as! CustomTableViewCell

        // CustomTableViewCellの接続しているUIButtonのタグにdelegateをセット
        cell.delegate = self

        return cell
    }

    // ページ移動用関数
    func movePage() {
        performSegue(withIdentifier: "移動したいページ用のSegue", sender: nil)
    }
}

// (省略)
コメントでも記載していますがCellを返すTableViewのDelegateの中で、プロトコルに準拠した関数を定義し、そちらでページ移動をしています。
Protocolはクラスに追加しておきましょう。
では、今回の記事は以上です。他にも多数のSwift関連の記事を記載しているので是非サイト内興味があれば見て行ってください。
コメント