今回の記事はC#でタスク常駐アプリのコンテキストメニューにボタンアクションを追加する方法に関しての記事です。初心者にも分かりやすいように記載していくので是非参考にしてみてください。
他にもコンテキストメニューからファイルダイアログを操作する方法に関しても記載しているので気になる方は下記記事も参考にしてみてください。
「【C#】タスク常駐アプリでファイルダイアログを表示する方法。」
C#でタスク常駐アプリの作成
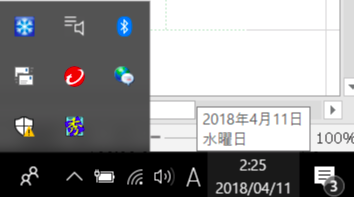
タスク常駐アプリとは下記画像のようなWindows独特のアプリです。
VisualStudioでフォームアプリを作成します。
[Visual c#]の中にある[Windows フォームアプリケーション(.NET Framework)]を選択して、[OK]ボタンをクリックすれば作成できます。このままビルドすると画面が現れてしまうので下記のように「Program.cs」を修正します。
using System;
using System.Collections.Generic;
using System.Linq;
using System.Threading.Tasks;
using System.Windows.Forms;

namespace Test
{
    static class Program
    {
        /// <summary>
        ///  The main entry point for the application.
        /// </summary>
        [STAThread]
        static void Main()
        {
            Application.SetHighDpiMode(HighDpiMode.SystemAware);
            Application.EnableVisualStyles();
            Application.SetCompatibleTextRenderingDefault(false);
            //Application.Run(new Form1());
            new Form1();
            Application.Run();
        }
    }
}
これで画面は現れずにビルドすることができます。
では次にフォームの中身(「Form.cs」)を修正していきます。
using System;
using System.Collections.Generic;
using System.ComponentModel;
using System.Data;
using System.Drawing;
using System.IO;
using System.Linq;
using System.Text;
using System.Threading.Tasks;
using System.Windows.Forms;

namespace Test
{
    public partial class Form1 : Form
    {
        //icon設定
        NotifyIcon notifyIcon;
        public Form1()
        {
            InitializeComponent();
            // タスクバーに表示しない
            this.ShowInTaskbar = false;
            this.setComponents();
        }
        //タスクバーにセットするもの
        private void setComponents()
        {
            notifyIcon = new NotifyIcon();
            var iconpath = "自身の指定するパス(.bmp形式のファイル32×32サイズ)";
            var bitmap = new Bitmap(iconpath);
            this.notifyIcon = new NotifyIcon()
            {
                Icon = Icon.FromHandle(bitmap.GetHicon()),
                Visible = true,
                Text = "アイコンにマウスポインタを合わせたときのテキスト"
            };
            notifyIcon.BalloonTipTitle = "タイトル";
            notifyIcon.BalloonTipText = "通知内容など";
            notifyIcon.ShowBalloonTip(3000);
            //アイコンクリック時のイベントを追加
            notifyIcon.Click += new EventHandler(NotifyIcon1_Click);
            // アイコンを表示する
            notifyIcon.Visible = true;

        }
        //アイコンクリック時に再表示
        private void NotifyIcon1_Click(object sender, EventArgs e)
        {
            notifyIcon.ShowBalloonTip(3000);
        }
    }
}
アイコンの設定など細かい箇所の説明は下記記事を記載しているのでそちらから参考にしてみてください。
タスク常駐アプリにコンテキストメニュー追加
// コンテキストメニュー(右クリック)
ContextMenuStrip contextMenuStrip = new ContextMenuStrip();
コンテキストメニューにボタン追加
// コンテキストメニュー(右クリック)
ContextMenuStrip contextMenuStrip = new ContextMenuStrip();
ToolStripMenuItem context = new ToolStripMenuItem();
context.Text = "&ファイルダイアログ";
context.Click += ToolStripMenuItem_Click;
contextMenuStrip.Items.Add(context);

//コンテキストメニューをiconに追加
notifyIcon.ContextMenuStrip = contextMenuStrip;
上記をForm.csに追加していきましょう。
using System;
using System.Collections.Generic;
using System.ComponentModel;
using System.Drawing;
using System.IO;
using System.Linq;
using System.Text;
using System.Threading.Tasks;
using System.Windows.Forms;

namespace Test
{
    public partial class Form1 : Form
    {
        //icon設定
        NotifyIcon notifyIcon;
        public Form1()
        {
            InitializeComponent();
            // タスクバーに表示しない
            this.ShowInTaskbar = false;
            this.setComponents();
        }
        //タスクバーにセットするもの
        private void setComponents()
        {
            notifyIcon = new NotifyIcon();
            var iconpath = "自身の指定するパス(.bmp形式のファイル32×32サイズ)";
            var bitmap = new Bitmap(iconpath);
            this.notifyIcon = new NotifyIcon()
            {
                Icon = Icon.FromHandle(bitmap.GetHicon()),
                Visible = true,
                Text = "アイコンにマウスポインタを合わせたときのテキスト"
            };
            notifyIcon.BalloonTipTitle = "タイトル";
            notifyIcon.BalloonTipText = "通知内容など";
            notifyIcon.ShowBalloonTip(3000);

            // コンテキストメニュー(右クリック)
            ContextMenuStrip contextMenuStrip = new ContextMenuStrip();
            ToolStripMenuItem context = new ToolStripMenuItem();
            context.Text = "&ファイルダイアログ";
            context.Click += ToolStripMenuItem_Click;
            contextMenuStrip.Items.Add(context);

            //コンテキストメニューをiconに追加
            notifyIcon.ContextMenuStrip = contextMenuStrip;

            // アイコンを表示する
            notifyIcon.Visible = true;
        }
    }
}
二つのボタンを追加したい場合は「contextMenuStrip.Items.Add(context);」で他の「ToolStripMenuItem」をどんどん追加していけば複数のボタンを追加できます。
では今回の記事は以上です。他にも多数のC#関連の記事を記載しているので興味があれば是非参考にしてみてください。
コメント